How to Add an Email Signature in Outlook: A Step-by-Step Guide
Table of Contents
ToggleEmail Signature in Outlook
An email signature is a valuable tool for personal branding, professionalism, and providing essential contact information in your emails. Microsoft Outlook offers a straightforward process for creating and adding an email signature to your messages. In this guide, we will walk you through the step-by-step process of adding an email signature in Outlook.
Step 1: Open Outlook and Access the Signature Options
1. Launch Microsoft Outlook on your computer.
2. Click on the “File” tab located at the top-left corner of the Outlook window.
3. From the drop-down menu, select “Options” to open the Outlook Options dialog box.
Step 2: Create a New Email Signature
1. In the Outlook Options dialog box, click on the “Mail” tab on the left-hand side.
2. Scroll down until you find the “Create or modify signatures for messages” section.
3. Click on the “Signatures…” button to open the Signatures and Stationery dialog box
Step 3: Add a New Signature
1. In the Signatures and Stationery dialog box, click on the “New” button to create a new email signature.
2. Provide a name for your signature in the “New Signature” dialog box and click “OK.”
• Choose a name that helps you identify the signature (e.g., “Business Signature” or “Personal Signature”).
Step 4: Customize Your Email Signature
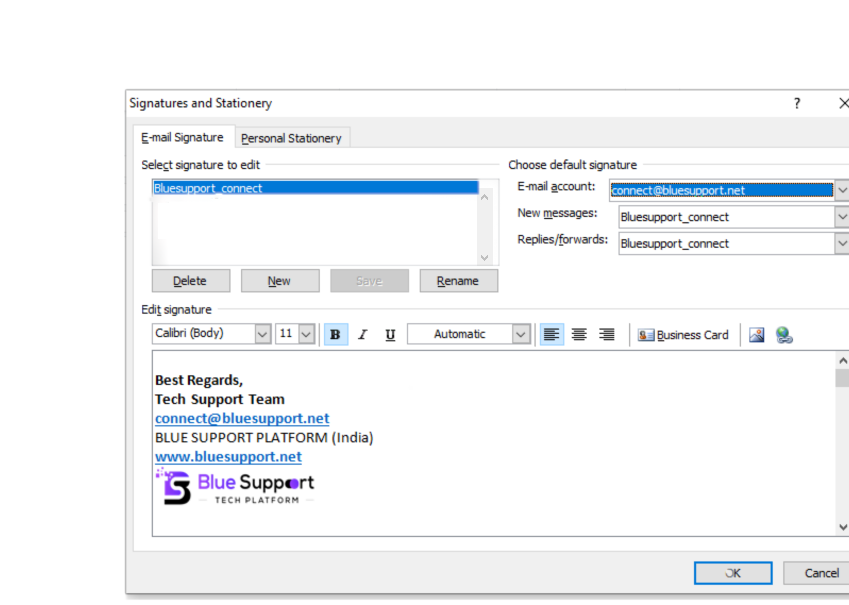
1. In the “Edit signature” section of the Signatures and Stationery dialog box, enter the text for your email signature.
• You can include your name, job title, company name, contact information, and any other relevant details.
• Use the formatting options provided to customize the font, size, color, and style of your signature.
• You can also add images, logos, and hyperlinks by using the icons in the toolbar.
2. To ensure a professional appearance, consider using a simple and clean design for your email signature.
3. If needed, you can create multiple signatures for different purposes (e.g., one for business emails and another for personal emails).
Step 5: Assign the Signature to Your Email Accounts
1. In the “Choose default signature” section of the Signatures and Stationery dialog box, select the email account(s) to which you want to assign the signature.
• If you have multiple email accounts configured in Outlook, you can choose different signatures for each account.
2. Use the drop-down menus in the “New messages” and “Replies/forwards” columns to select the signature you want to use for each situation.
• “New messages” refers to the signature added when you compose a new email.
• “Replies/forwards” refers to the signature added when you respond to or forward an email.
3. Once you have assigned the signatures, click “OK” to save your changes and close the Signatures and Stationery dialog box.
Step 6: Test Your Email Signature
1. Open a new email message in Outlook to test your newly created email signature.
2. Ensure that the signature appears correctly and contains all the desired information.
3. Make any necessary adjustments or edits to the signature in the Signatures and Stationery dialog box if needed.
4. Repeat the testing process until you are satisfied with the appearance and content of your email signature.
By following these step-by-step instructions, you can easily add a professional email signature to your Outlook messages. Remember to keep your signature concise, visually appealing, and up-to-date with relevant contact information. With an email signature, you can enhance your email communication.